Types of Roofing

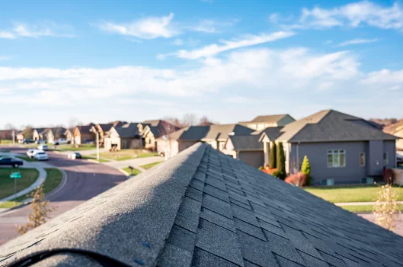
The roof protects buildings from rain, snow, sunlight, extremes of temperature, and wind. It can be constructed in various forms, including flat, pitched, vaulted, or domed.

Roofing

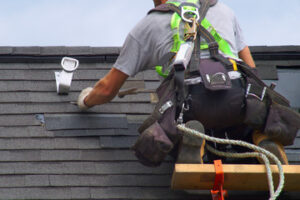
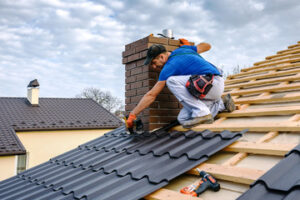
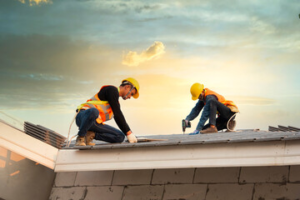
Roofing contractors install and repair residential and commercial roofs. They use ladders and scaffolding to access rooftops. They must carefully navigate residential neighborhoods while working on the homes’ exteriors. Visit https://roofersjacksonvillefl.co/ to learn more.

Restoration coatings are applied directly to your existing roof, eliminating the need for a messy tear off and saving you money. The liquid material seeps into any cracks or seams and seals them, creating a monolithic membrane that lasts for the life of the building and beyond. These systems can be recoated every 10+ years to extend the lifespan of your roof and improve its performance.

These systems are very cost-effective for extending the life of a commercial roof, reducing maintenance and energy costs, and enhancing energy efficiency. They are also very fast to install, allowing your business to continue operating during the process. However, it is important to note that they will not fix all issues your roof may have. For instance, if the underlying insulation or membrane is deteriorating or has been saturated, they will not stop leaks and a full replacement may be necessary.

Another key point to consider is that these coatings are not a substitute for preventative repairs or roof system inspections. They are a good solution for a roof that is approaching the end of its serviceable life and will only provide a warranty for the new coating. They will not address any underlying problems that may occur such as moisture infiltration, ponding water or musty odors, and will exclude warranty coverage for those conditions.

Before applying a restoration coating, a full infrared inspection should be performed to verify that the existing roof is structurally sound and does not have any areas of leaking or deterioration. Once these issues have been addressed, the roof should be power washed and prepped for the application of the coating. The coating is sprayed directly onto the roof, and a primer can sometimes be used but is usually not required.

The installation of a restoration coating is significantly faster than a traditional roof replacement. The project duration will vary depending on the scope of work but is usually completed within a few days minimizing disruption to your facility operations. In addition, these systems are very environmentally friendly as they do not require a roof tear off and are sprayed directly on the existing roof, utilizing the materials that are already in place.

Single-Ply

A single-ply membrane is a type of commercial roof that uses sheets of rubber and other synthetics to create a layer of protection for your building. Single-ply membranes are available in a variety of colors, materials, and thicknesses to suit your specific project needs. Two of the most popular single-ply membrane types include Thermoplastic Polyolefin (TPO) and Ethylene Propylene Diene Terpolymer (EPDM). Each has its own benefits. EPDM has been around for more than 60 years, so it has a long history of laboratory and field testing to support its performance as a commercial roofing material. TPO is newer, but it offers energy efficiency that can help lower your building’s utility costs. Both offer resistance to chemicals, moisture, and biological growth.

Single-ply systems are typically used on flat or low-sloped commercial buildings. They’re fire-resistant and have good insulation, which can help lower your heating and cooling costs year round. They’re also durable against heavy weather conditions and have a long lifespan when properly maintained and expertly installed.

Single ply membranes can be mechanically attached, fully adhered, or self-adhered. They’re usually made from either thermoplastic or thermoset plastics. The difference between the two is that thermoplastics can be melted and reshaped, while thermoset plastics are permanent once they’re cured. Single-ply membranes come in black or white. The white versions are more reflective and can help keep the building cooler, while the black ones absorb more of the sun’s rays.

Some of the downsides to single-ply membranes include their susceptibility to punctures, limited aesthetic options, and longevity concerns. Additionally, they can have issues with seam failure, which may result in standing water or air infiltration.

When it comes to installing a single-ply system, your pro will mechanically attach the membrane to the cover board and then apply a layer of adhesive and seam tape to the seams. If you choose a fully adhered or self-adhered option, your pros will first secure the insulation to the roof deck and then use adhesives to glue the single-ply membrane to the insulation. The process takes longer and requires specific temperatures and waiting periods to cure.

TPO

TPO stands for Thermoplastic Polyolefin and is a single-ply membrane roofing material that is flexible, energy-efficient and durable. It’s a popular choice for commercial roofs due to its versatility and ease of installation. In addition to its durability, TPO’s reflective surface helps decrease your energy costs by deflecting UV rays. It’s also resistant to chemicals and punctures. This makes it a great option for flat or low-slope roofs. TPO is available in various thicknesses and widths, so you can choose the option that best suits your building.

When installing TPO, it’s important to prep the roof to ensure the material adheres and performs well. The surface should be cleaned thoroughly and any existing covering removed before laying the new membrane. After a sheet of TPO is placed on the roof, it should be set and secured using either mechanical tools or adhesive. Once it’s firmly anchored, the overlapping edges should be heat welded with a hot air gun or other heated tool to seal the seams and create an insulated barrier.

If you opt to use mechanical attachment, it’s crucial that you use the right fasteners and do so in a way that doesn’t leave too much space between them. These details will impact how long your TPO roof lasts and its effectiveness. You can also choose to have a professional roofer heat weld the seams instead, which will result in better durability and refined leak protection.

TPO is a relatively new roofing material, so it doesn’t have the same track record as some of its counterparts. However, it’s highly affordable, works in most climates and is very versatile. It’s a great option for those looking to get the most out of their budget while getting a quality roof.

In order to repair a TPO roof, you need to catch damage early before it worsens. A professional roofer will be able to determine the extent of the damage and recommend the most effective solution. This may include repairing the damaged area, replacing it or installing a completely new roof.

Metal

Metal roofing is gaining popularity for its ability to add beauty and durability, as well as help reduce energy costs. It’s available in a wide range of colors and textures, so homeowners can find a look that fits their aesthetic preferences. The roofing can also boost a home’s resale value. However, it’s important to understand the process and installation requirements before hiring a contractor. This will ensure the job is completed correctly and in compliance with local regulations and standards.

The first step in installing a metal roof is to get the correct measurements for the project. This may require climbing onto the roof to take the measurements, so it’s important to use caution when doing so and follow safety practices. Once the measurements are complete, it’s time to start putting on the panels. It’s important to work in rows, overlapping each panel as you go. This will create a better seal and prevent water from pooling in areas where there’s a lack of overlap. It’s also important to ensure the panels are properly seated. If they aren’t, the roof will not have a proper seal.

Once the panels are in place, it’s time to install the gable flashing. This is metal trim that covers joints where different sections meet on the roof. It should be cut to size and secured using neoprene washer head screws. The screws should be driven to seat flat on the roof, as opposed to being over-tightened. Over-tightening can cause the screws to rust or become dislodged over time.

Zinc is one of the most popular options for residential metal roofing due to its affordability and longevity. It can be used in all weather environments and has the added benefit of being highly recyclable. It is also lightweight, making it a good option for homes with low structural capacity or those in earthquake zones.

Steel is another common choice for residential metal roofing. It’s a durable solution that is often used in commercial buildings, but it’s becoming more common for residential projects as well. It’s a cost-effective solution that can be painted to mimic the appearance of Copper, Zinc, or Weathered Steel.

Roof Installation Boosts Curb Appeal and Energy Efficiency

Roof installation gives your home a new layer of defense against the elements, boosts curb appeal, and improves energy efficiency. It also offers a strong return on investment.

Roof Installation

Your roofers will lay tarps around your landscaping to keep debris from getting wet and park a dumpster on your driveway for easy access. They’ll then clear away all existing materials and inspect the flashing around chimneys, vents, and skylights to ensure they have a tight seal. Visit Website to learn more.

When you’re installing a new roof, you need a variety of roofing materials to create an attractive and durable finish. Your roofing material choice will also have a direct impact on your home’s energy efficiency. Certain types of shingles reflect sunlight rather than absorb it, which reduces the amount of work that your HVAC system has to do to keep your home comfortable.

Regardless of the type of roof you choose, it’s important to start with a solid foundation. This includes a sheet of plywood or OSB to form the roof deck and provide a sturdy base for the main roofing system. You’ll also want to use a protective underlayment that helps prevent water and moisture damage.

For flat roofs, a built-up roof is one of the most popular choices. This is a durable and inexpensive option that can last for decades. A modified bitumen flat roof is another popular option. It uses a mixture of gravel and tar to form a waterproof layer. The tar provides durability, and the gravel gives it extra strength against weather conditions.

If you prefer a natural look for your home’s roof, wood shakes and shingles are a good choice. These are available in a variety of colors and styles to match your house’s aesthetics. However, they aren’t as durable or long-lasting as other roofing materials. If you live in an area with frequent wildfires, a metal roof might be a better option for your home.

Another high-end option is slate. This is a durable and fire-resistant material that requires professional installation and maintenance. It’s also more expensive than shingle and other roofing materials.

Besides these traditional roofing materials, you can also choose a tile roof or a metal roof. These are durable and attractive options that can last for 50 years or more. Metal roofs are also energy efficient, as they’re designed to reflect the sun’s UV rays instead of absorbing them.

For roof installation, you’ll also need tools like a hammer, utility knife and a chalk line. The hammer is used to nail down the underlayment and the shingles, while the utility knife is useful for cutting and shaping the shingles and the underlayment. The chalk line is necessary to snap straight lines across the rooftop, which ensures symmetrical placement.

Preparation

Before beginning roof installation, the team will remove any existing shingles or other roofing materials. This can be a noisy process and may disturb any pets or children in the home. If necessary, it’s a good idea to arrange for them to stay with friends or family while the work is underway. The pounding of hammers and nail guns during the construction process will cause vibrations that can damage items inside the home. It’s best to move wall-hung pictures, delicate mementos and knickknacks to a safe location until the project is completed.

It’s also a good idea to cover items in the attic to keep them safe from falling debris during the construction process. If there are any patio furniture pieces, bikes or anything else that is outside, it’s a good idea to move them into a shed or garage until the project is complete. This will protect these items from the dust and shingle debris that will be floating around.

The next step is to put down a layer of underlayment. This will help to waterproof the area of the roof where the slopes meet. The first row will get fastened at the roof’s edge with cap nails, and then the other rows will be laid over it, overlapping each other by six inches or more. The final row will be laid over the ridge and then secured with a drip edge to direct water runoff away from the sides of the house.

Once the underlayment is in place, the contractor will begin to install flashing and fascia. The flashing is a metal material that is placed around chimneys, vents, windows and other areas to prevent leaks. The fascia is a board that runs along the bottom edges of the eaves and covers the gap between the soffit and rafters.

Once the soffit and fascia are in place, the ridge caps can be installed. This is the element that will be visible from the ground, and it will be nailed or screwed into place depending on your roof’s type and design.

Installation

Your roof plays a critical role in your home, protecting you from the elements while adding beauty and value. It’s also an important part of your energy efficiency, regulating indoor temperatures and helping you save on your utility bills. Choosing the right roofing material and installing it properly can have lasting benefits for your home, improving its durability and value.

Before any work begins, your contractor will review your roof installation options and provide you with a contract that outlines project details, including the type of roofing materials and labor costs. This will help prevent surprises down the road. You may also need to get a permit for the project, depending on your community’s regulations. Additionally, you may need to have flashing installed around chimneys, skylights or vents and cap the ridge of your roof.

Once the permit and other paperwork has been taken care of, it’s time to start building your new roof! Before the roofers begin, they will need to safely remove any existing shingles and metal sheets. This process will produce a lot of noise. If you have children or pets that are sensitive to loud noises, it might be a good idea to relocate them during the roofing process.

The roofers will then lay the underlayment, which is a protective layer against moisture. Once this is in place, they’ll begin running the shingles on the first course. They’ll overlap the shingle with the next one, and nail it down with cap nails at four to six inches from the edge, then spread out the nails as they move towards the center of the roof.

If you chose a tile roof, the contractors will lay the tiles in an interlocking pattern to create a beautiful and durable surface. If you chose a wood or shake roof, the roofers will sawmill shingles or shakes to ensure they have a consistent look and thickness. These materials are more expensive than asphalt shingles, but they offer a more natural and rustic look to your home. A properly installed roof can last for years, providing weather protection, regulating indoor temperatures and promoting energy efficiency.

Weathering the Storm: Your Essential Guide to Emergency Roofing Repairs

Sometimes, major damage to the roof can require a fast response. If a big storm damages a roof section and allows water to pour into the home, it can destroy drywall, carpets, and household items. The first thing to do is inspect the damage from a safe distance. Take clear photos of any damaged areas. Contact Emergency Roofing Columbus GA now!

roofing

When your roof is damaged, you must act fast to protect your house and everything within it. This is especially true if the damage compromises your roof’s ability to stop water from entering your home. Water is one of the most destructive elements and, once it gets inside your house, it can quickly ruin drywall, carpeting, household items, and more. Compound damage from a roofing disaster can result in massive repair bills and can also cause health and safety concerns for your family and pets.

The first step is to assess the situation carefully, considering any structural instability. You should also look for potential dangers, such as fallen tree limbs or any power lines that the storm may have downed. If you notice any immediate hazards, evacuate the home and call emergency services.

Once you have a safe place to stay, you can begin assessing the damage from a safer location. Be sure to wear sturdy gloves, non-slip shoes, and a pair of protective glasses to avoid injury. Look for signs of major structural damage, including holes or leaks in the roof and any underlying components. Take photos of the damage, and if possible, move any valuable items to a safer area.

It is best to avoid getting up on the roof if you think it’s in need of an emergency repair, as any falls could further damage your roof and make the situation worse. Instead, apply a tarp to prevent further water damage and use cement or waterproof tape to patch up small holes or cracks.

While fire isn’t usually considered a roofing problem, the heat and smoke from a fire can quickly destroy shingles, underlayment, roof trusses, and other structural components. Any structural damage from a fire needs to be addressed immediately, or your entire home may be at risk of collapse. Luckily, most modern roofing materials are designed to offer some degree of fire resistance, but this doesn’t mean your roof is indestructible. A fire that burns long enough and hot enough will eventually consume even the toughest roofing materials.

When roof damage occurs, it can impact your family’s safety and your home’s structural integrity. In these situations, homeowners must act quickly and make informed decisions to mitigate immediate risks until professional help arrives. This guide to emergency roofing outlines the steps you can take to prevent further damage and protect your home until the pros arrive.

Before you call a roofer, take photos of the damaged area to document the extent of the problem. This can be a huge help when filing an insurance claim to cover the cost of repairs. If you can’t safely climb onto the roof to check the damage, you can also use a camera or smartphone to snap pictures from inside your home.

Take note of any visible damage such as missing shingles or storm debris that may have fallen into the home. Additionally, pay close attention to water stains on the ceiling or walls. If you notice any brown spots, these are likely caused by a leak in the roof and must be addressed as soon as possible.

Suppose you’re able to, move any items that are susceptible to water damage away from the affected areas. This can include electronics, furniture, artwork, and other personal belongings. You can also place tarps over these items to further protect them from any leakage that may occur.

Once you have a clear idea of the extent of the damage, you’ll need to decide whether the situation constitutes an emergency. As a general rule of thumb, any type of roof damage that allows water to enter your home is considered an emergency. A shingle missing or a crack in the roof will not require an emergency repair, but any severe leaks or collapsing parts of the roof must be treated immediately.

As you assess the condition of your roof, try to stay calm and think critically. Often, roof damage looks worse to the homeowner than it does to a trained eye, so it’s important to remain level-headed in these situations. If you can’t safely access your roof, consider calling a roofer to tarp the area.

A tarp provides a protective layer that safeguards the interior of your home from water infiltration, mold growth and further damage. However, it does not address the underlying issues and should not be left in place for an extended period of time.

It is essential to assess the extent of storm damage as soon as it is safe to do so. Loose shingles, cracked surfaces and leaks all require immediate attention to prevent further harm and protect the structural integrity of your home. It is also important to remove any fallen debris that could clog gutters or interfere with the flow of rainwater, as well as any water pooling on the roof surface.

Once you have a clear picture of the damage, it is important to take additional steps before applying a tarp. Remove any limbs or other objects that could fall onto the tarp, and make sure to secure it using nails or bungee cords. It is also a good idea to clean the area and move any furniture away from the damaged areas. In addition, unplug electronics and move them to a dry area to avoid electrical hazards.

Next, use a tape measure to determine what size tarp will be needed for the repair job. It is a good idea to apply the tarp as soon as possible before the weather turns worse. This will help minimize further damage and water infiltration and allow you to navigate insurance claims more easily.

It is also a good idea to apply a sealant to any cracks or leaks as a temporary solution. This will help to seal any holes and provide some protection against further damage until a professional roofing contractor can arrive to repair the underlying problem.

Emergency roof repairs are a necessary step to ensure the long-term health of your home and to protect your valuable possessions from moisture infiltration. With regular inspections and proper maintenance practices, you can reduce the risk of severe damage to your property and enjoy peace of mind until a permanent solution is put in place by an experienced professional.

A well-maintained roof is a vital component of your home that protects you and your family from the elements. However, unforeseen issues can cause damage that requires immediate attention. Recognizing the signs of an emergency roofing situation and acting promptly can save you time, money, and the stress of costly repairs.

A leaking roof can lead to extensive water damage and costly repair work. If the issue is not resolved quickly, mold and mildew can also form in your home, causing health problems. In addition, a flooded roof can cause ceiling damage and structural problems. It is important to act swiftly and call a roofing contractor for assistance with emergency roof repairs.

While it is tempting to improvise and try to fix the problem yourself, it is important to remember that roofing professionals are trained to deal with emergency situations. Before taking any action, it is important to assess the damage from a safe distance and ensure that you do not put yourself or your family in danger. In cases of severe damage, it may be necessary to evacuate the area and wait for professional help.

The first step in dealing with an emergency roofing situation is to cover any exposed areas of the roof with a tarp. This will prevent further damage and leakage until a roofing contractor can arrive to conduct an inspection. Additionally, it is important to contact your homeowners’ insurance representative and ask for recommended roofing professionals. They can offer guidance on the next steps and provide recommendations based on their experience.

After a storm, it is common for some roofing materials to blow off and fall to the ground. These items can include shingles, nails, and flashing (the material that wraps around chimneys, skylights, vents, and other roof penetrations). If you notice these pieces in your yard, it is a sign of a serious problem and should be addressed as soon as possible.

Roofing Repair – Six Signs That Your Shingles Are Damaged and Need to Be Replaced

Your roof is the shield that keeps you safe from the elements. Without it, the interior of your home would be exposed to water damage, pest infestations, mold, higher energy bills, and potential resale problems.

Roofing repair involves fixing components in and around the roof, like gutters, vent boots, and more. Orlando Roofers include caulking, repairing or replacing shingles, and resealing the flashing areas.

roofing

Your roof is an integral part of your home, protecting you and your belongings from the elements. However, it can become worn and damaged over time, making it susceptible to moisture infiltration and those dreaded ceiling leaks. Taking a proactive approach to roofing repair can prevent small issues from snowballing into a costly replacement project. Here are six common signs that your shingles are damaged and need to be replaced.

Loose or missing shingles are the first indication that your roof is vulnerable to leaks. They weaken your roof’s defense and allow moisture to penetrate the structure of the house, causing damage to the interior and leading to a host of other problems.

Depending on the severity of the issue, it is best to address loose or missing shingles as soon as possible to avoid further roof leaks and structural damage. If you suspect your shingles are damaged, consult a professional roofer to ensure your home is properly repaired and protected from the weather.

Most contractors will carefully inspect your shingles, the first line of defense, looking for granule loss, dents and gaps or cracks that could be caused by the weather or other factors. They will also check for signs of moisture penetration, such as water stains on the ceiling or walls.

If your shingles are damaged, they will need to be replaced with new ones to maintain the integrity of your roof and protect your home’s interior. The process of replacing a shingle is relatively simple, but it is essential to follow the correct steps and take your safety into account. Always use a ladder that is stable and secure, and make sure you have a partner to help you in the event of an accident.

Before you begin, gather your supplies: a hammer, a flat pry bar and a utility knife and a handful of 1-1/4-in. roofing nails. Slide the pry bar under the shingle immediately above the damaged section and lift gently to break the sealant strip connection and expose the first row of nails beneath. Once you have a bare area, remove the nails and pull up the shingle to discard.

Flashing is a sheet of metal or rubber that prevents water from entering the interior of your home around chimneys, vents and skylights. Flashing is a common place for leaks to begin, and it’s one of the most important areas to inspect during roof maintenance. Often, flashing is damaged by corrosion or the natural wear and tear of weather. This can cause rust spots and small holes in the flashing, which is why it’s important to schedule routine roofing inspections with 

Flashing can also be damaged by the freeze-thaw cycle your home experiences during winter. When cold temperatures cause water to freeze, the flashing will expand, and when it thaws, tiny gaps will form that can grow over time.

If left unattended, damage to flashing can lead to leaks and rot in the interior of your home. It’s important to have any flashing repair done as soon as you notice it, before the damage spreads.

You can fix most minor flashing problems by simply removing the affected section of flashing, then replacing it with a new piece. You’ll need to use a ladder that is in good condition and carefully inspect the area to make sure that no shingles are loose or damaged before proceeding. If you’re not comfortable working from a ladder, you can always have a professional roofing contractor take care of this repair for you.

Once the new flashing is in place, you can replace the shingles that were removed. Be sure to follow the proper installation procedure, including covering the nail holes with roofing sealant, and making sure that all of the shingle seams are properly aligned. You should also apply two more beads of roof cement to the top of the flashing, just as you did with the original repair.

Even if your flashing is in good shape, it’s a good idea to have a professional roofing company inspect it at least once per year. These roofing professionals can spot small issues and potential weak points before they become larger problems. This can save you a lot of money and headaches in the long run!

One of the most common causes of roof damage is leaking. If water leaks onto the shingles or attic floor, it can rot wood and ruin insulation. Also, leaking water can stain the ceiling, smear paint and mess up plaster. In addition, it can also cause mold to grow. If you notice water stains on the ceiling, it is important to find the source of the leak as soon as possible so that you can repair it.

You can often spot a leaking roof by the presence of black marks, water stains or mold. However, if the leak is in a difficult to reach area of the roof or you have a vaulted ceiling, it can be more challenging to determine where the leak is coming from. In these cases, enlist the help of a friend who is willing to go up on the roof with you and hold a garden hose. Start low and soak the roof, moving the hose in various directions and yelling for your friend when you hear a drip. This process can take some time, but it is often successful in finding the source of the leak.

Leaks usually occur through damaged shingles or flashing, especially around chimneys, skylights and vents. However, they can also happen along the intersections of different planes and in areas where shingles are missing or loose. It is important to “think like a water” when searching for the source of a leak, since moisture will travel downhill and seep into areas where there are cracks or holes.

Once you have found the source of a leak, you can patch it using roofing cement or tar. If you use the tar option, make sure to cover it with a layer of roofing shingle over it to ensure that the leak is fully sealed. A caulk can be used instead, but it is not as durable and will eventually degrade over time. Once the patch has been applied, it is a good idea to do a general inspection of the roof to make sure there are no other areas that need repair.

If your roof is extensively damaged, repair or replacement might not be possible. Missing shingles, large holes, extensive water damage or extreme physical damage might be beyond the scope of what can be fixed by a roofing company. However, if your roof is nearing the end of its lifespan or has a limited number of problems, a repair may be all you need.

Repairs involve removing the damaged materials and replacing them with new ones. The most common type of repair involves patching an area with new shingles. This can be done for a small section of your roof or for the entire surface. Repairs can also replace damaged flashing, caulk or tar. This can fix leaks, prevent further water damage and make the area less visible.

Re-roofing is a more involved process that can be performed in sections or for the whole roof. Re-roofing can repair a leaky roof, but it won’t repair other types of damage to the underlying roof deck or the structural support members. To access the damaged areas, roofers will remove a row of shingles at least two rows up from the area to be worked on. They will then lay down a layer of asphalt roofing paper to create an inner barrier that can prevent water penetration. This is usually tacked or stapled in place, and it should overlap another strip of ice-and-water protection laid down below it.

To repair a roof vent, your roofer will use a pry bar to separate the top of the vent from the shingle. They will then cut away a portion of the shingle to reveal the drywall beneath and then use a utility knife to trim off any deteriorated sections of the drywall. A slit in the drywall can be stuffed with a piece of heavy-duty insulating foam or a rolled-up blanket. They will then apply a thick bead of roofing cement or exterior sealant to the drywall, and they will nail a new row of shingles over it.

Before a roofer starts work, you should clear out the attic and move objects that could fall during the re-roofing process. It’s also a good idea to prune any tree branches that are hanging over your roof and to move any ceramic landscaping features or outdoor furniture from the vicinity.

What Does a Roofer Do?

West Chester Roofer construct, repair, and replace the roofs of buildings. They may also re-slate and tile roofs and fit skylight windows. They use a wide variety of tools and materials to do their work.

They usually collaborate with other construction professionals and must have good customer service skills. They also attend safety meetings and receive yearly training to improve their skills.

A roofer professionally builds, inspects, repairs, and replaces the roofs of commercial and residential buildings. They may also apply a waterproof coating or install insulation. This person often works with a team of other construction professionals. Generally, a roofer must complete an apprenticeship program and pass a series of tests to become certified as a journeyman. They will have experience working as a helper on a job site and must adhere to all safety guidelines.

A successful roofer has several job duties and must be comfortable with outdoor conditions, including rainy weather and heat. They must be able to use various tools and stand on ladders or scaffolding for extended periods. A roofer should be able to communicate well with the construction manager or supervisor on the project and must follow their directions.

The specific responsibilities for this role can vary, depending on the type of roofing and the employer. However, all roofers perform some basic tasks, such as tearing off old materials and installing new roofing materials. They may also clean the roof and sweep debris from the work site.

Other responsibilities include preparing, estimating, and transporting roofing materials and installing and repairing various roof types, such as conventional built-up, inverted built-up, and single-ply modified. They may also be responsible for damp, water, and weather-proofing walls, floors, and roofs and binding and sealing openings in slate, leadwork, tile, and shingle roofing.

In addition, a successful roofer will have excellent attention to detail and should be able to read blueprints and other technical documents. They must be able to work as part of a team and be willing to travel to job sites in different areas.

A roofer is a skilled craftsman who can take years to become fully qualified in the field. They are usually trained through an apprenticeship program consisting of on-the-job and technical training. Upon completing the apprenticeship, the roofer will be eligible to receive a journeyman certificate from their local trades council.

Roofers install, repair, and maintain the roofing systems that protect indoor spaces from rain, snow, and sun. They must be in good physical condition and can work at heights. Those wishing to become roofers usually learn the trade through on-the-job training. Some may undergo a three-year apprenticeship program administered by local union-management committees representing roofing contractors or the United Brotherhood of Roofers, Waterproofers, and Allied Workers.

During the apprenticeship, new roofers start as helpers and are taught how to carry equipment, set up scaffolding, and prepare the site for roofing work. They also learn basic roofing techniques, such as how to cut and fit various types of materials. They are also trained in roofing, including asphalt shingles and wood shingle roofs.

As they gain more experience, roofers are trained to perform more complex roofing tasks and are sometimes given supervisory responsibilities. They must be able to read and understand technical plans and blueprints and measure and calculate material requirements. Those who wish to advance in roofing can become superintendents or estimators for roofing contractors or even roofing contractors themselves.

In some states, such as Massachusetts, a roofer must obtain a state license to work on residential or commercial structures. The requirements vary from state to state but generally include passing an exam and having years of experience. Other states, such as Idaho, require that roofers register with the state. They must have a Construction Contractor or Residential Specialty Contractor license, or both, and pass an examination.

Those looking to become roofers should take high school courses in shop, basic mathematics, and mechanical drawing. These will help develop the analytical and quantitative skills necessary for the job and provide an academic foundation that can help them pursue higher education and eventually become engineers or architects.

Working conditions for roofers can be very demanding. They are required to work in varying extreme weather conditions (hot and cold). They also have to climb and descend ladders frequently throughout the day and lift heavy loads of material to 40 feet regularly. In addition, roofers are often required to load and unload their equipment from vehicles at varying heights. Therefore, they must be healthy and physically fit before entering the field. Despite these challenges, many people choose to make a career as a roofer because it can be rewarding and satisfying.

The job outlook is positive as demand for new roofing continues to grow. Even though this is a physically demanding career, if you are a hard worker and can perform the tasks necessary to be successful, there are many employment opportunities in this trade.

While demand for roofers is usually less impacted by economic cycles than other construction trades, the industry can slow during periods of low construction activity. During these times, it is common for roofers to look to other trades for work.

Roofing contractors are also expected to participate in the green economy as more building owners demand environmentally friendly roofs. For example, some roofs are coated with a special material reflecting sunlight rather than absorbing it, which helps keep the building cool and reduces air conditioning costs. This type of roofing is known as a “cool roof” and can be installed by a roofing contractor.

In addition to installing and repairing roofs, some roofers may also be responsible for managing their businesses. They must make decisions about supplies, equipment, and marketing for their company. They are also required to complete safety training every year. As a result, the work for this career can be quite diverse and exciting.

Self-employed people are often expected to provide health insurance and retirement savings plans. They are also required to pay taxes on their earnings. Those who work for large roofing companies are generally offered benefits such as medical and dental coverage, paid vacation and holiday time, and a profit-sharing plan.

For those interested in pursuing a career as a roofer, the first step is to attend vocational school or community college and complete a program that prepares you for the demands of this trade. Some colleges offer certificate programs, while others provide associate and even bachelor’s degrees in roofing-related subjects. Then, you can receive on-the-job training from more experienced roofers and learn the necessary skills.

You can spot signs of flashing damage by checking the shingles around the area and looking for any gaps or cracks. In addition, if you notice that a section of the flashing has become loose, this is another sign that it needs to be repaired or replaced.

It’s important to note that if the flashing is damaged or missing, it must be replaced with new flashing before you can re-shingle the roof. In most cases, roofing professionals will have to remove the shingles above the area and install the new flashing before putting the shingles back in place. They may also have to re-seal the edges of the flashing to keep water from seeping into your home.

Fortunately, it is fairly easy to repair flashing damage. Most flashing is pre-fabricated and comes in a variety of sizes and lengths. If you have a long piece of flashing that has been damaged, you can simply cut a small piece of aluminum (or whatever type of metal your flashing is made from) and use it to patch the gap. This should be covered with a layer of roofing cement to ensure that the patch is protected from further weathering and water leaks.

It’s a good idea to have your roof and its components (including the flashing) inspected at least once a year by a professional roofer. Doing so will help catch problems early and prevent them from getting worse and causing more expensive damage to your home.